Run using DingTalk Notification
Star (0)This tutorial will show you how to integrate Monika with DingTalk to get your Monika notifications
Setup DingTalk Robot
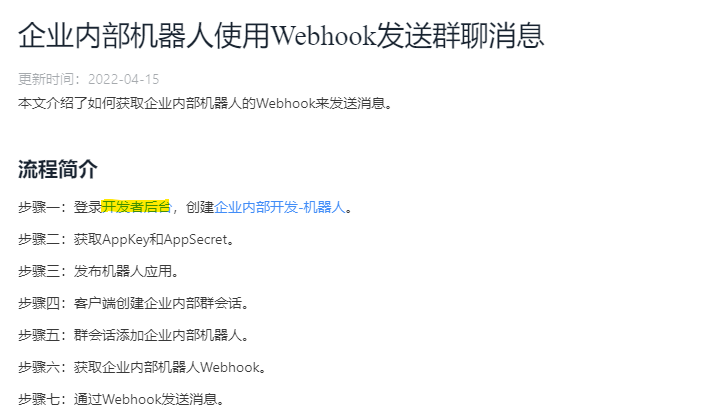
Setting up DingTalk could be very difficult if you can’t read Chinese. So, we will guide you on how to do it with pictures so that you can understand it more straightforwardly.
First, you need to open https://open.dingtalk.com/document/group/assign-a-webhook-url-to-an-internal-chatbot to access the documentation. Then, you need to click the highlighted URL below:
Assuming you already have a DingTalk account, you will be redirected to the page in the image below. If you haven’t, you will be redirected to create an account.

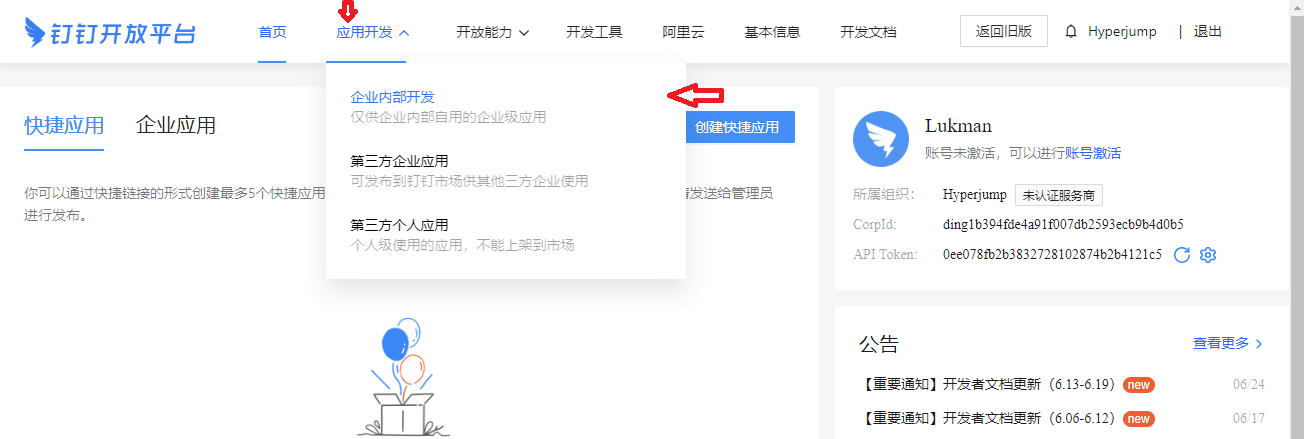
After that, go to the second menu on the navbar, and select the first sub-menu like so:
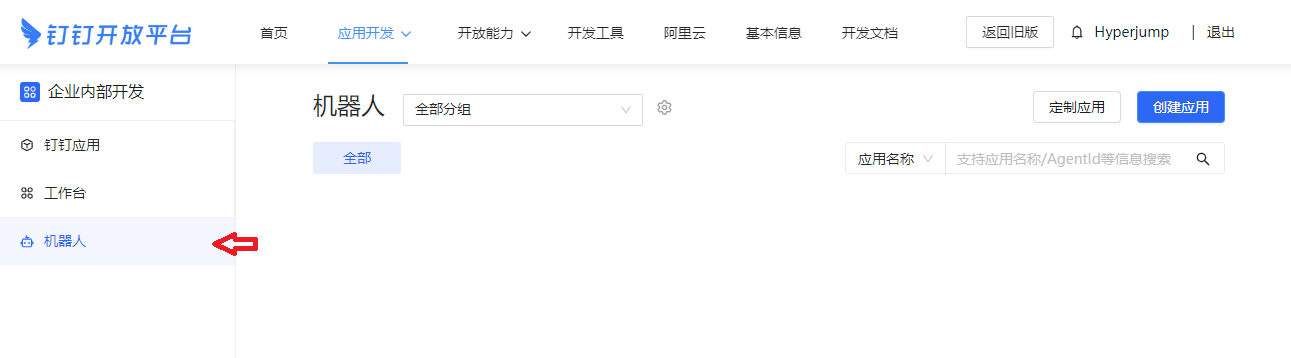
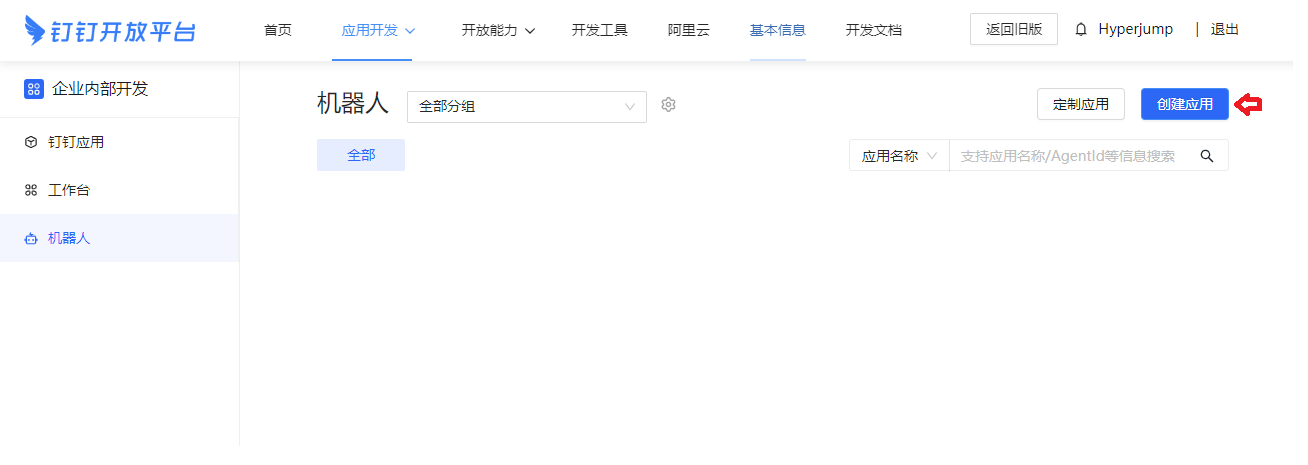
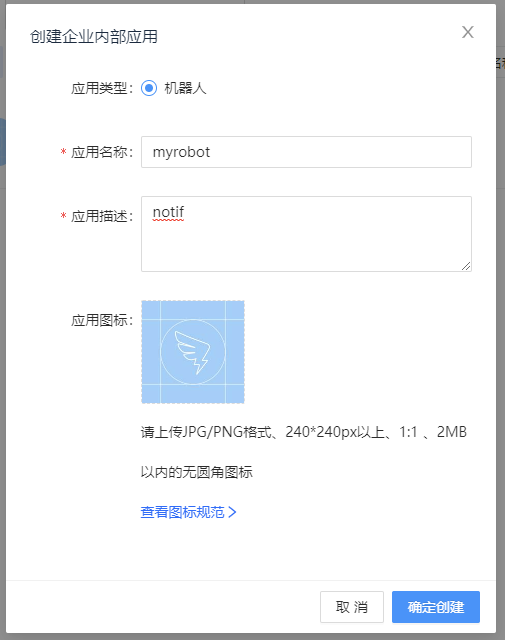
You will be redirected to another page. Select the last menu on the sidebar, and click the blue button to create a robot.
After that, you will be prompted to fill out a form to create a robot. Fill out the form with the application name, description, and icon. Once that’s done, click the blue button again.
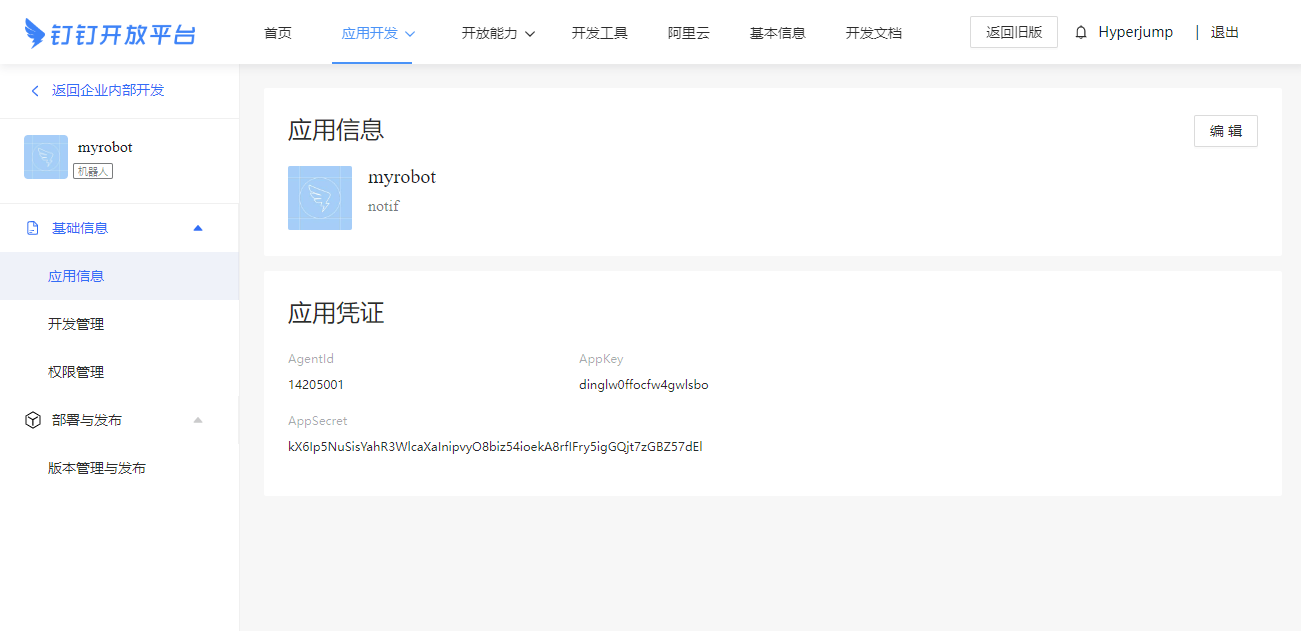
If the bot has been successfully created, it should redirect you to the robot details page.
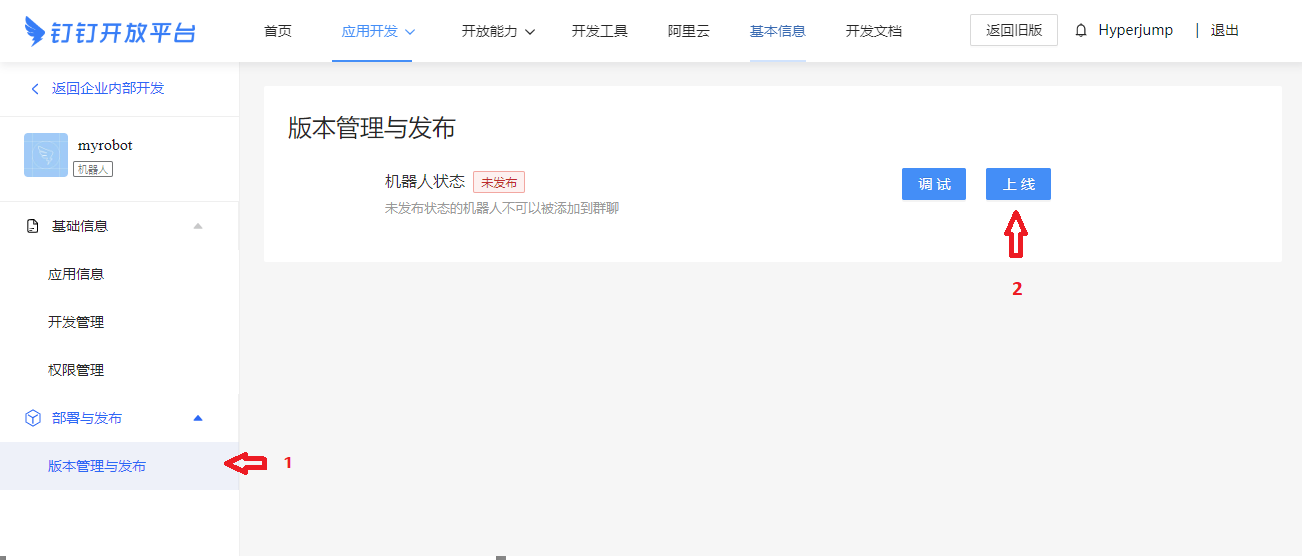
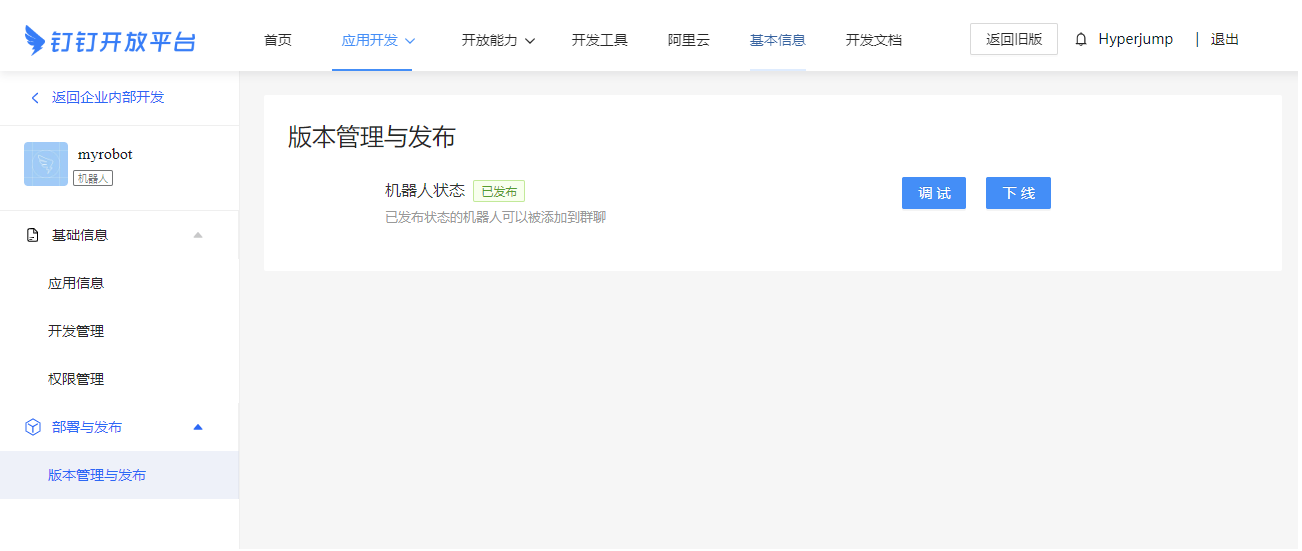
But your newly created robot has not been activated yet, so let’s activate the robot by selecting the last menu on the sidebar, then select the first sub-menu of it, and click the right blue button. Once that’s done, the red indicator should turn green.
Use DingTalk Robot in the Desktop App
Now that we have successfully created the robot, we can use it in the desktop app. So, download the desktop app and authenticate with your credentials. Then, create a new group for the robot to be added.
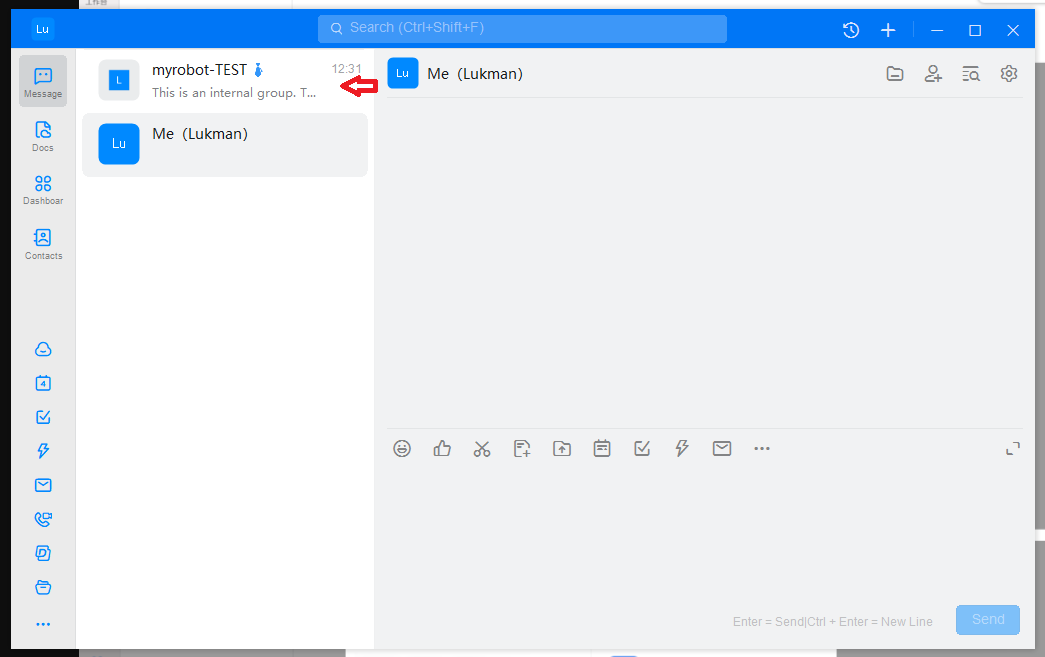
Then, click the group and open the settings inside the group and click the Group Assistant menu.

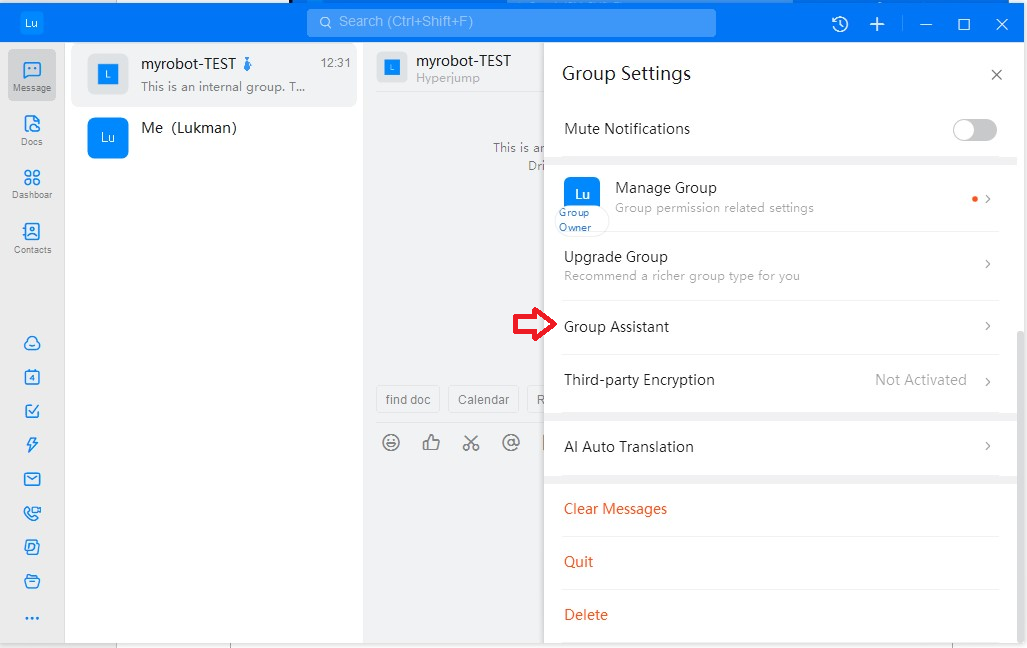
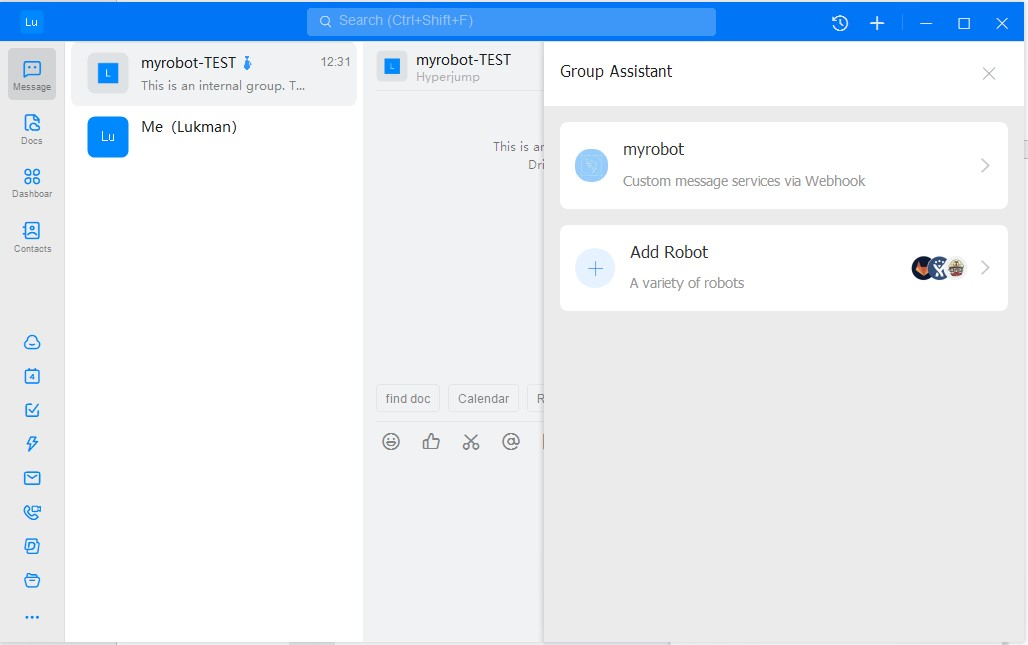
From there, you can add your previously created robot. Click the robot name you have just created.
A popup will appear showing your robot data. Scroll down to the webhook URL and copy the webhook URL to another place. Then, copy only the access token in the webhook URL. The access token format should be like this:
https://oapi.dingtalk.com/robot/send?access\_token=<your\_access\_token>
Save it to somewhere safe as we are going to need it later.
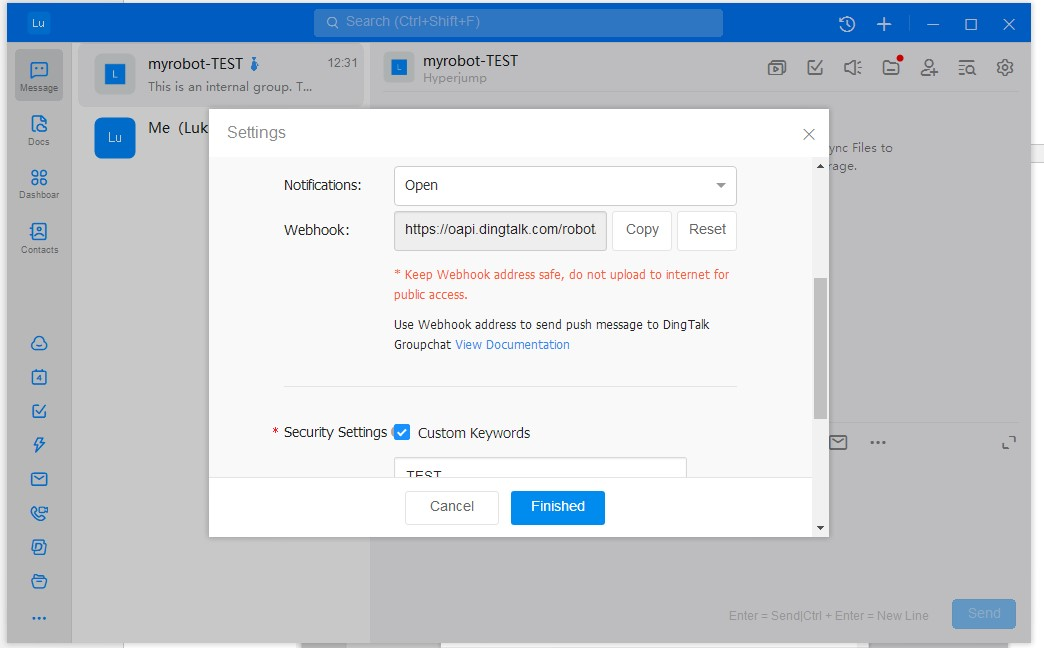
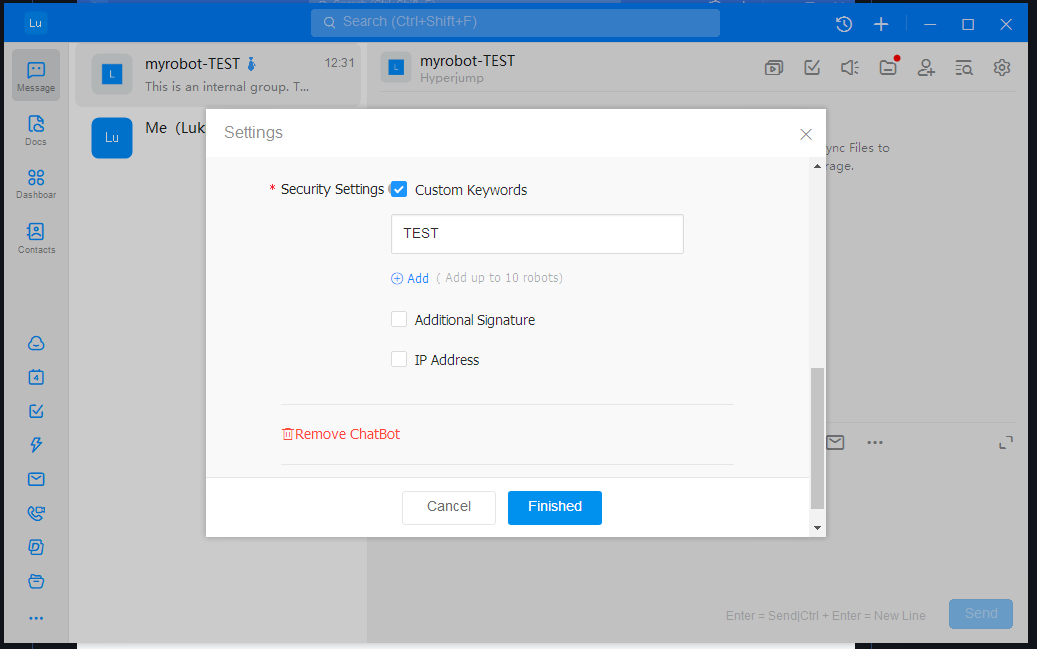
Additionally, you can secure your robot by allowing keywords. Scroll down to Security Settings and check the Custom Keywords checkbox. From there, you can define the keywords allowlist yourself.
We are finally done with the DingTalk setup, all that’s left is to set up Monika with the DingTalk webhook URL.
Integrating Monika with DingTalk
Now that we have our access token from DingTalk, it’s time to create a Monika configuration called monika.yml
notifications:- id: dingtalk-notiftype: dingtalkdata:access_token: <your_access_token>probes:- id: '1'name: Hyperjumpdescription: Landing pageinterval: 1requests:- method: GETurl: 'http://localhost:3000/api/demo/status'alerts:- query: response.status != 200message: Status not 2xx
Let me explain the configuration a little bit:
- Monika will use DingTalk as their notification channel, using the access token from the previous step
- Monika will probe http://localhost:3000/api/demo/status every one second
- Monika will alert you if the response status code is not 200
Once that’s done, run the monika.yml with the configuration above.

Congratulations! You have successfully integrated Monika with DingTalk!


PT Artha Rajamas Mandiri (Hyperjump) is an open-source-first company providing engineering excellence service. We aim to build and commercialize open-source tools to help companies streamline, simplify, and secure the most important aspects of its modern DevOps practices.
Copyright © 2026 Hyperjump Tech. All Rights Reserved.